")
")


This guide provides step-by-step instructions for installing Joomla 5 on a local virtual server using XAMPP.
If you already have a domain and hosting, refer to: How to Install Joomla 5 on a Live Server with Cpanel
Check out the following articles to learn how to create your own virtual server Setting Up a Virtual Server (Hosting) on Your Computer Using XAMPP
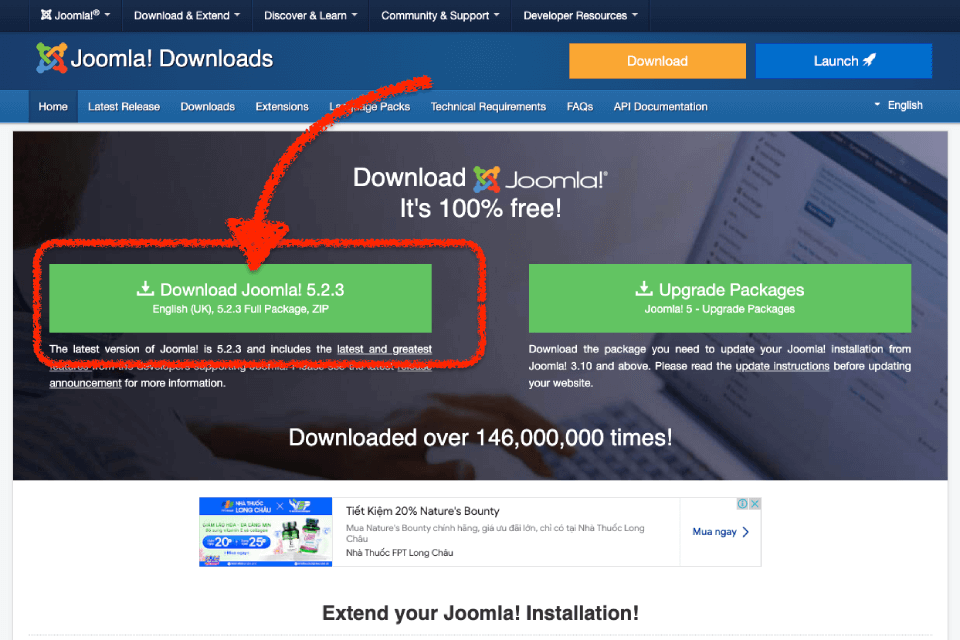
1. Download Joomla 5
Get the latest Joomla 5 version from the official website:
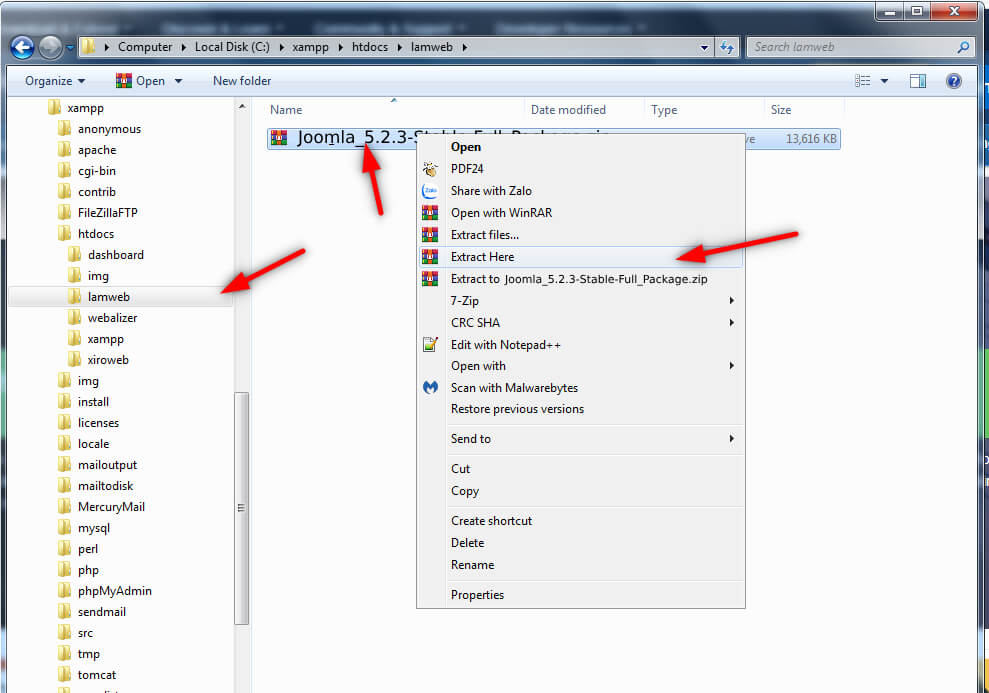
2. Extract Joomla Files to XAMPP's htdocs Directory
- Navigate to the
htdocsfolder inside your XAMPP installation directory. - Create a new folder to extract Joomla files source code (e.g.,
lamweb): In the htdocs folder, create a new folder to store your Joomla source code. You can name it whatever you like (just avoid spaces). In this example, I'll create a folder named "lamweb" for demonstration purposes. - Move the downloaded Joomla zip file into this folder and extract it.
3. Start the XAMPP Virtual Server
Launch xampp-control.exe from the XAMPP installation directory and start Apache and MySQL.

4. Create a Database for Joomla
Did you know that with a single set of source code, you can build multiple websites, each with unique data? That’s because all the content, settings, and user information are stored in a database—an essential part of any website.
XAMPP comes with a built-in database system, so you don’t need to install anything extra. To create a new database, just follow these steps:
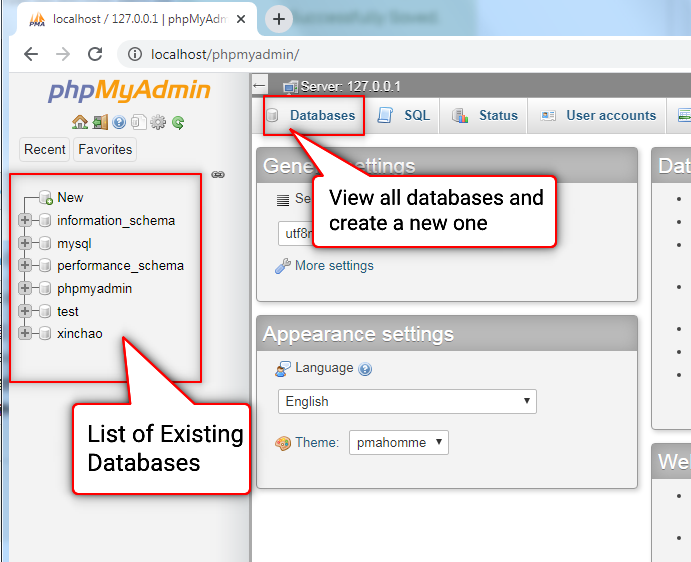
Open your browser and go to http://127.0.0.1 or http://localhost
Click on phpMyAdmin
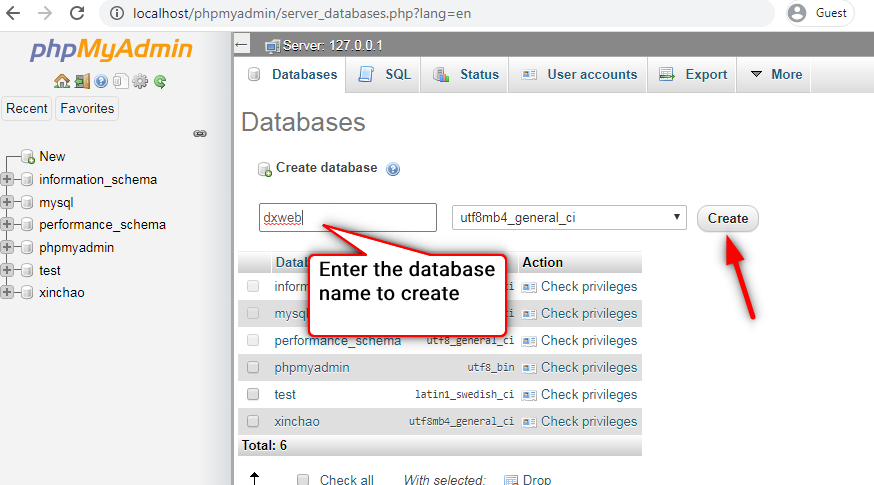
Create a new database (e.g., dxweb)

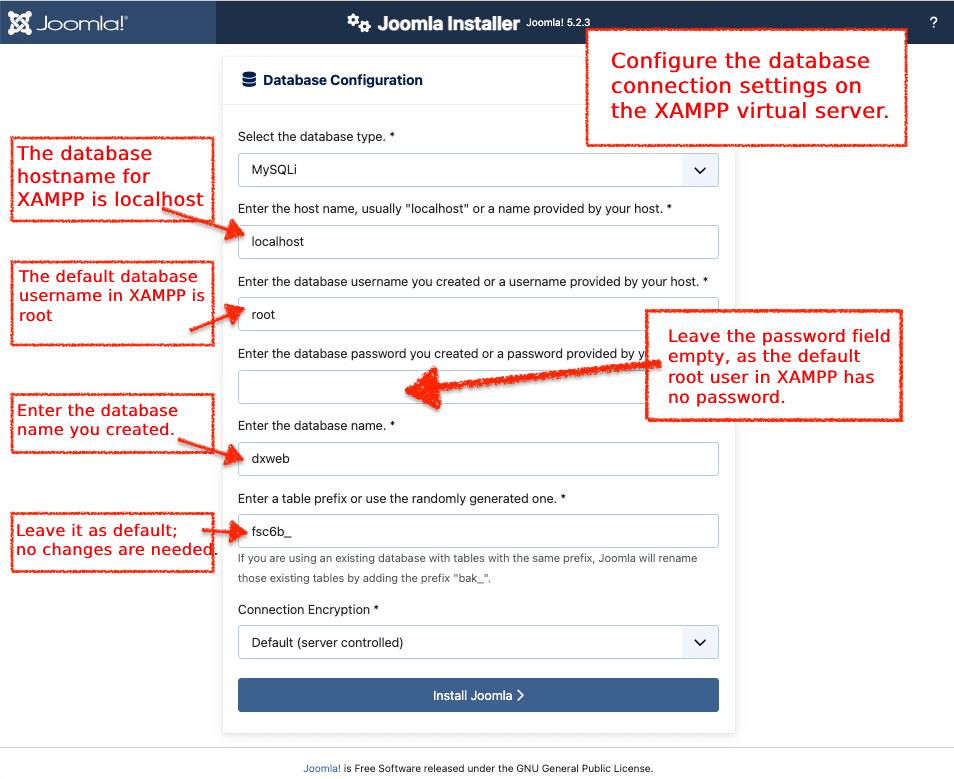
Database Connection Information
You will need these details when setting up Joomla:
Server:
localhost(default)
Username:root(default)
Database Name:dxweb
Password: (Leave blank)
5. Install Joomla 5
Open your browser (e.g., chrome), and go to http://127.0.0.1/myweb/
At this point, the Joomla 5 PHP files you extracted earlier will start running, and the first webpage will appear. You’ll see the installation screen, which is essentially just another webpage.
Instead of displaying a regular website, the PHP code detects that Joomla hasn’t been set up yet and automatically loads the installation wizard to guide you through the process.
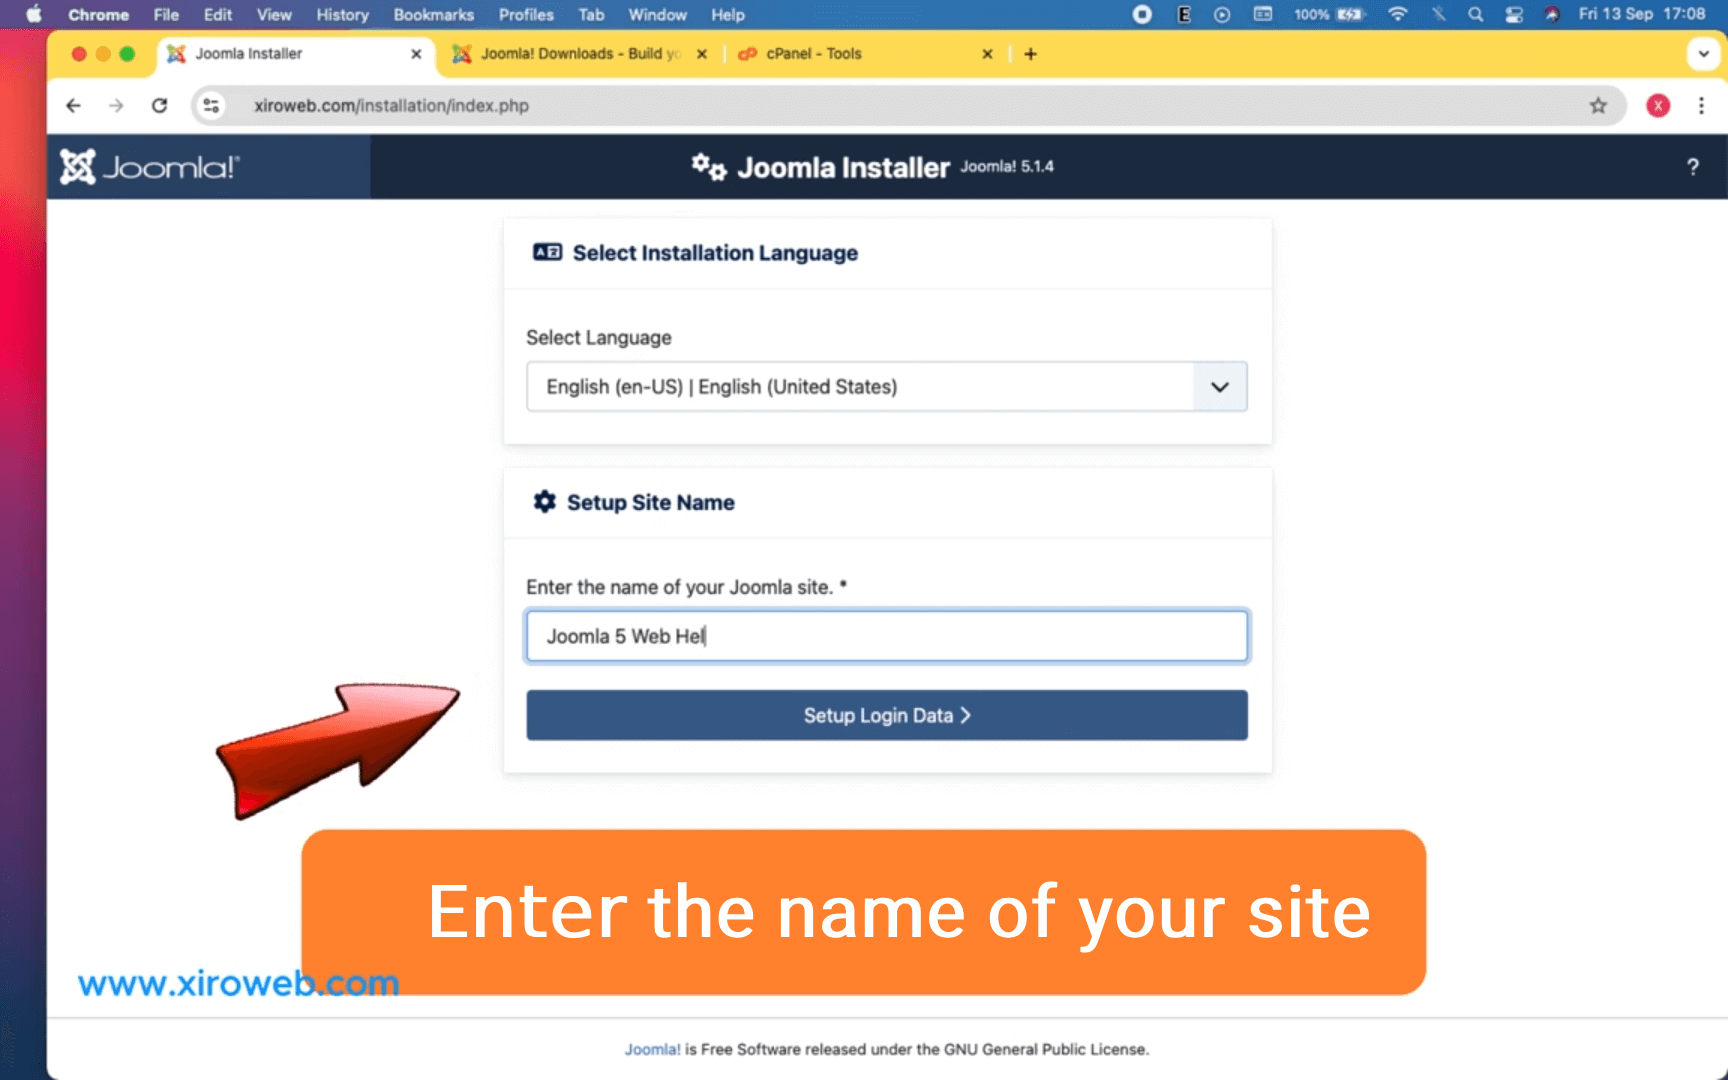
Enter the required information so Joomla 5 can set up your website.
Give your site a name—don’t worry too much about it, as you can always change it later.
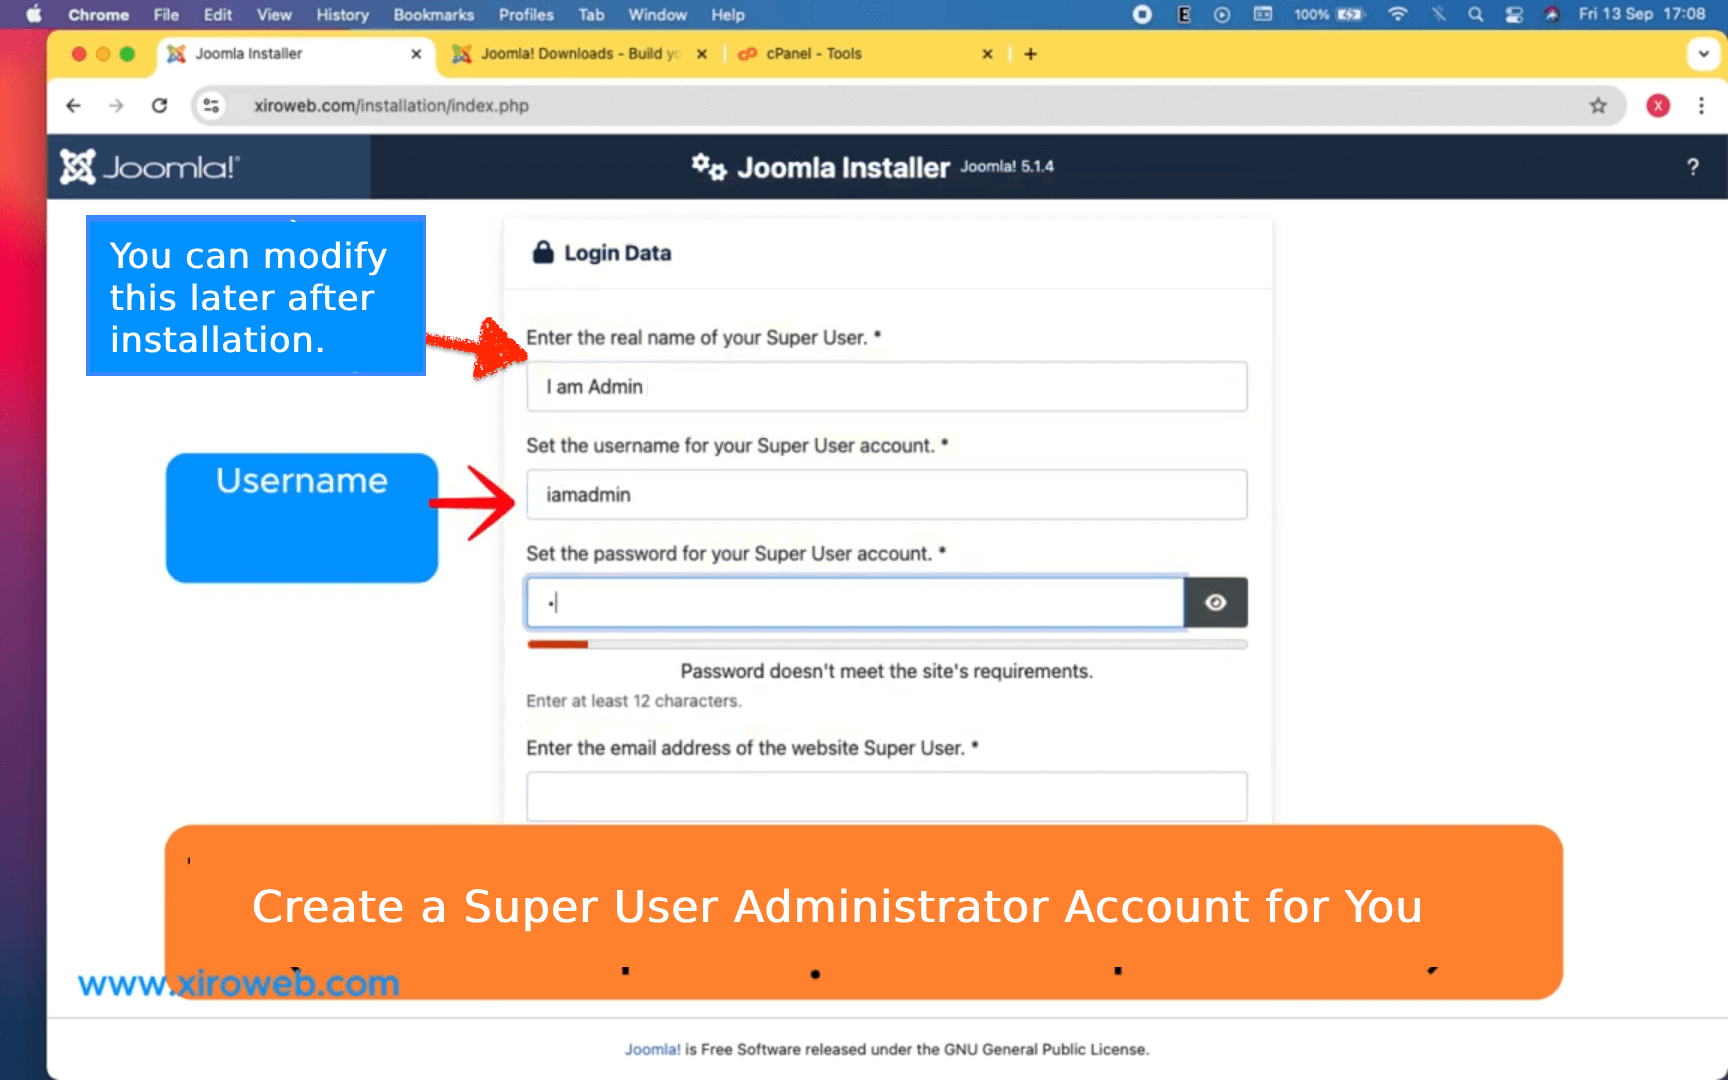
Create a Super User Account to Access Your System
You will need to enter your information to create a login account for yourself. This account will be used to log in to the system once your Joomla website is set up. The account you create will be a Super User account, which has the highest level of access and permissions to manage and control everything on your website.
Enter your database connection details.
Use the database you created in Step 4 and enter the required information here so Joomla 5 can connect to the database on your XAMPP server.
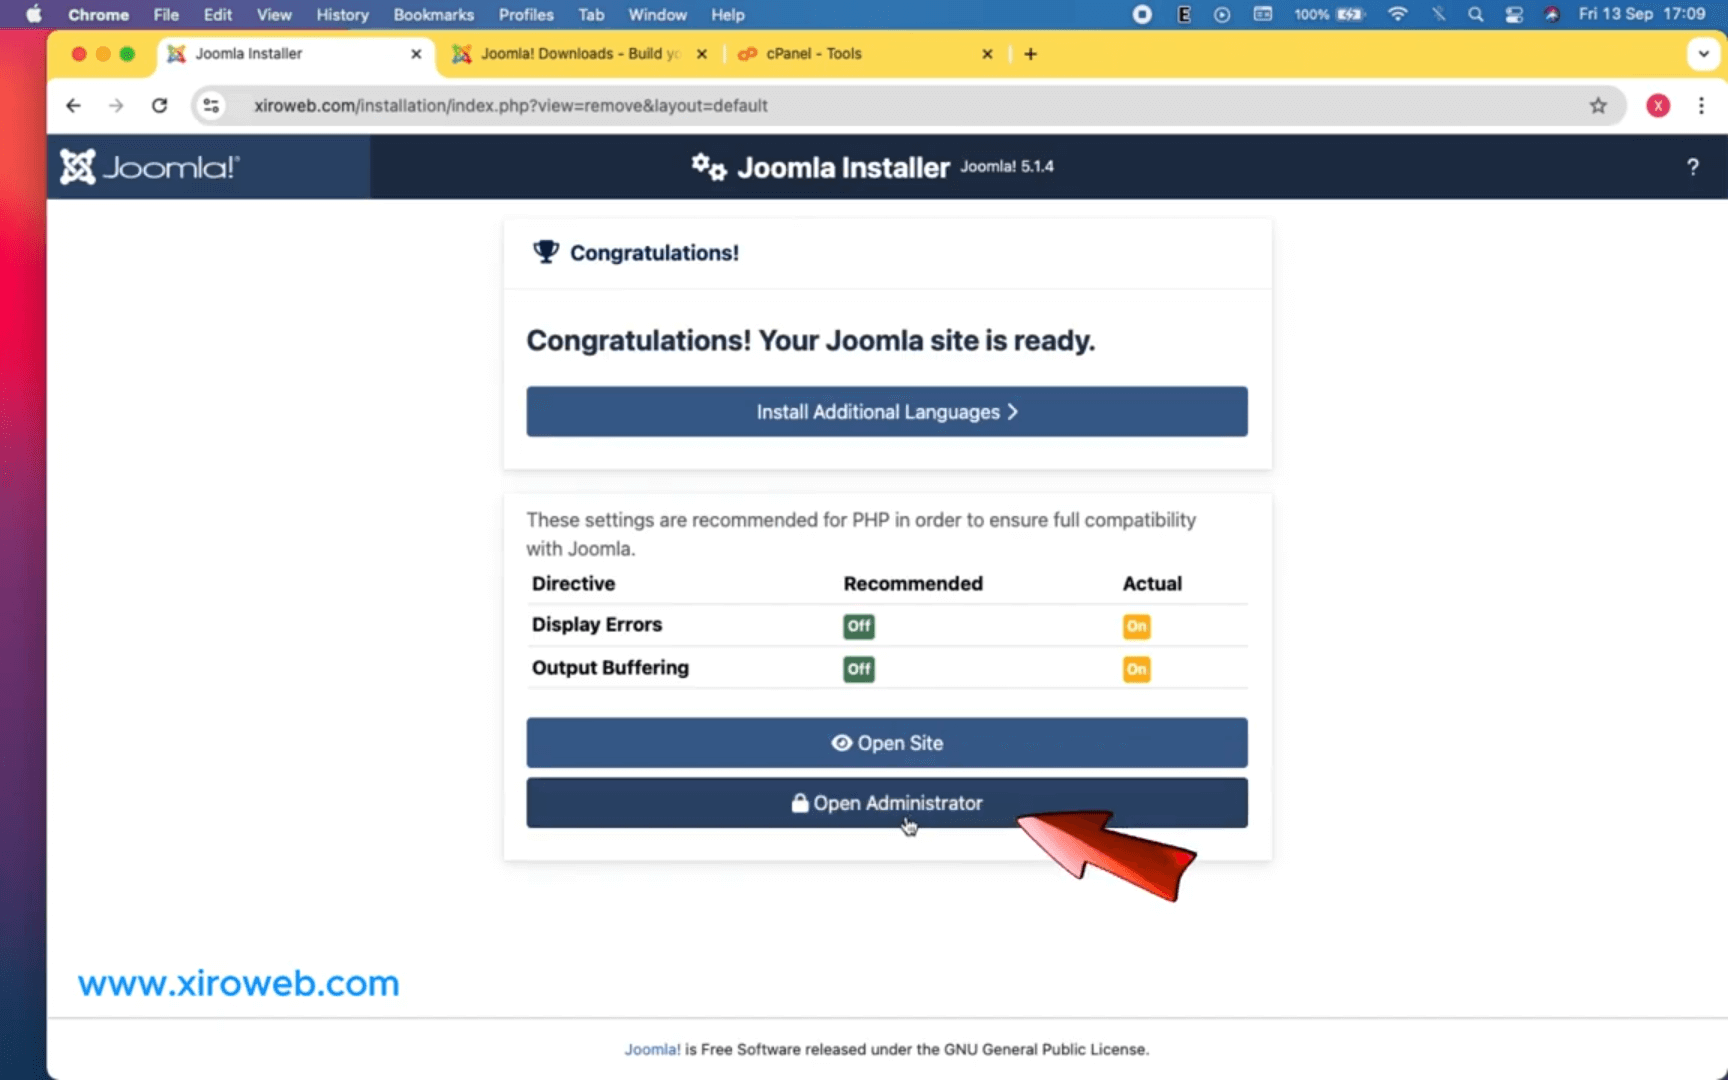
Once you've filled in the details, click Install Joomla. When you see the Congratulations! message, your Joomla 5 website has been successfully installed.
To access the admin dashboard, click Open Administrator.
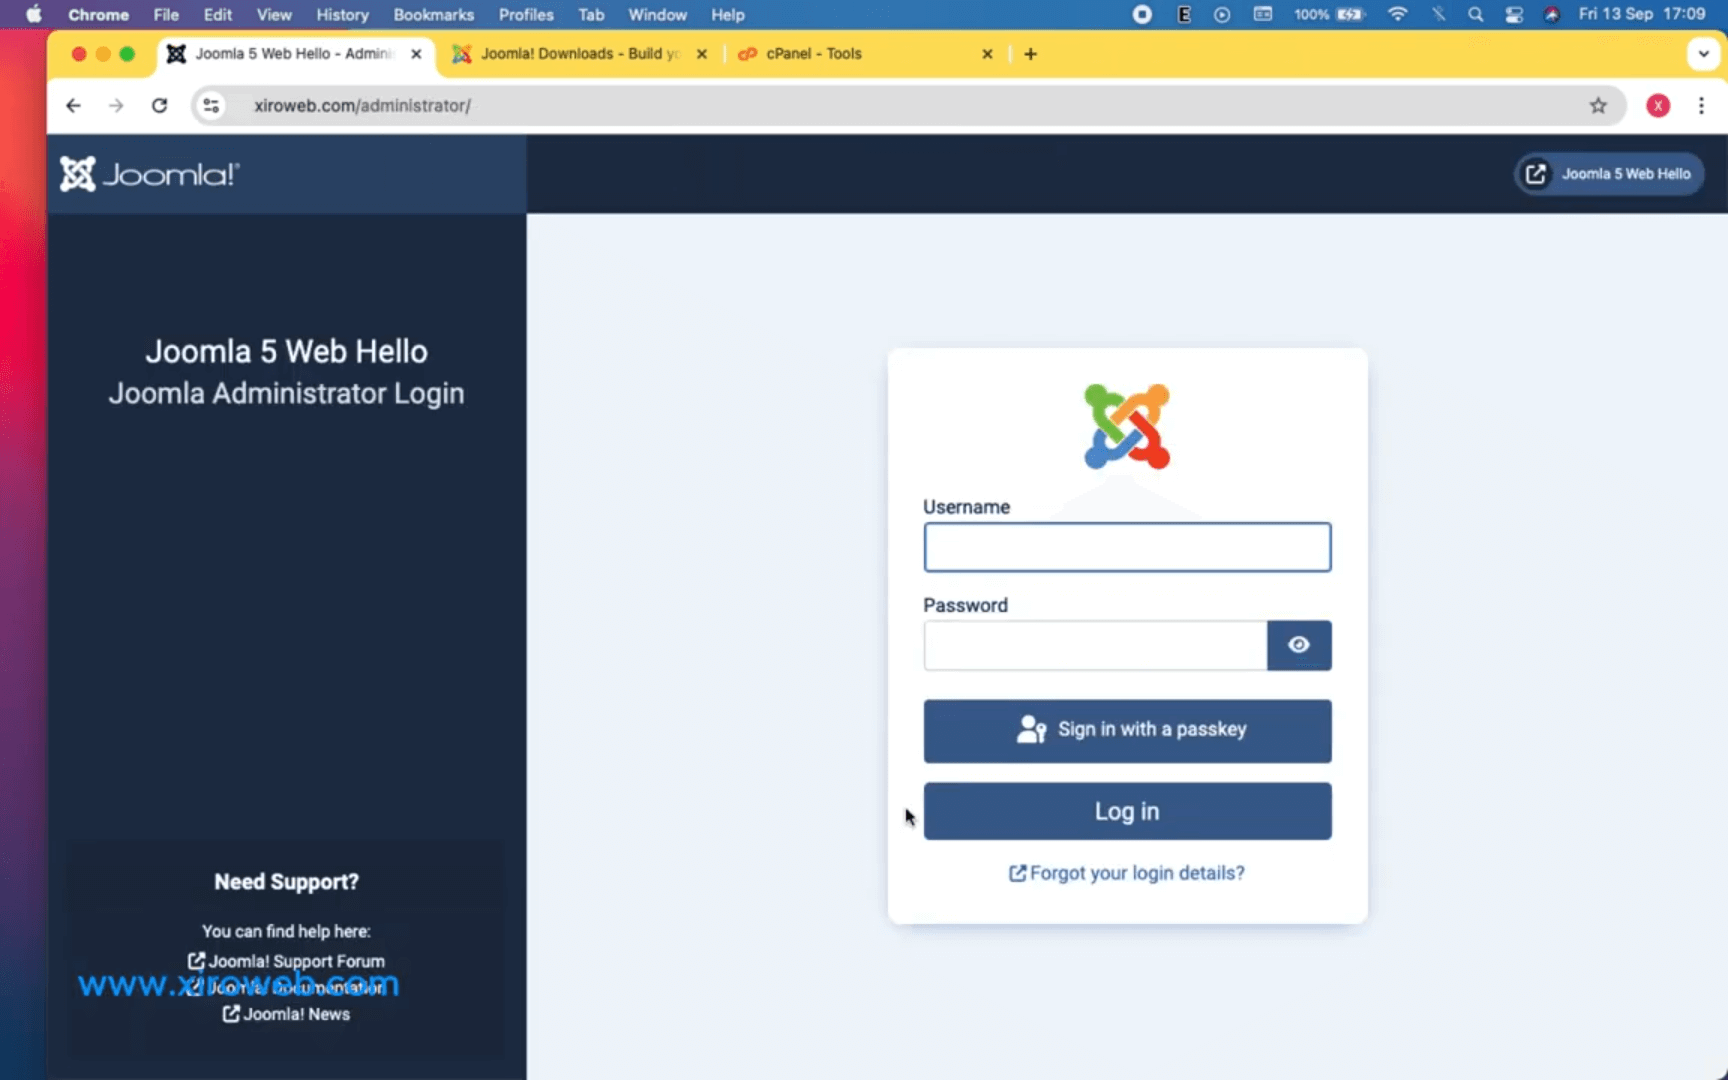
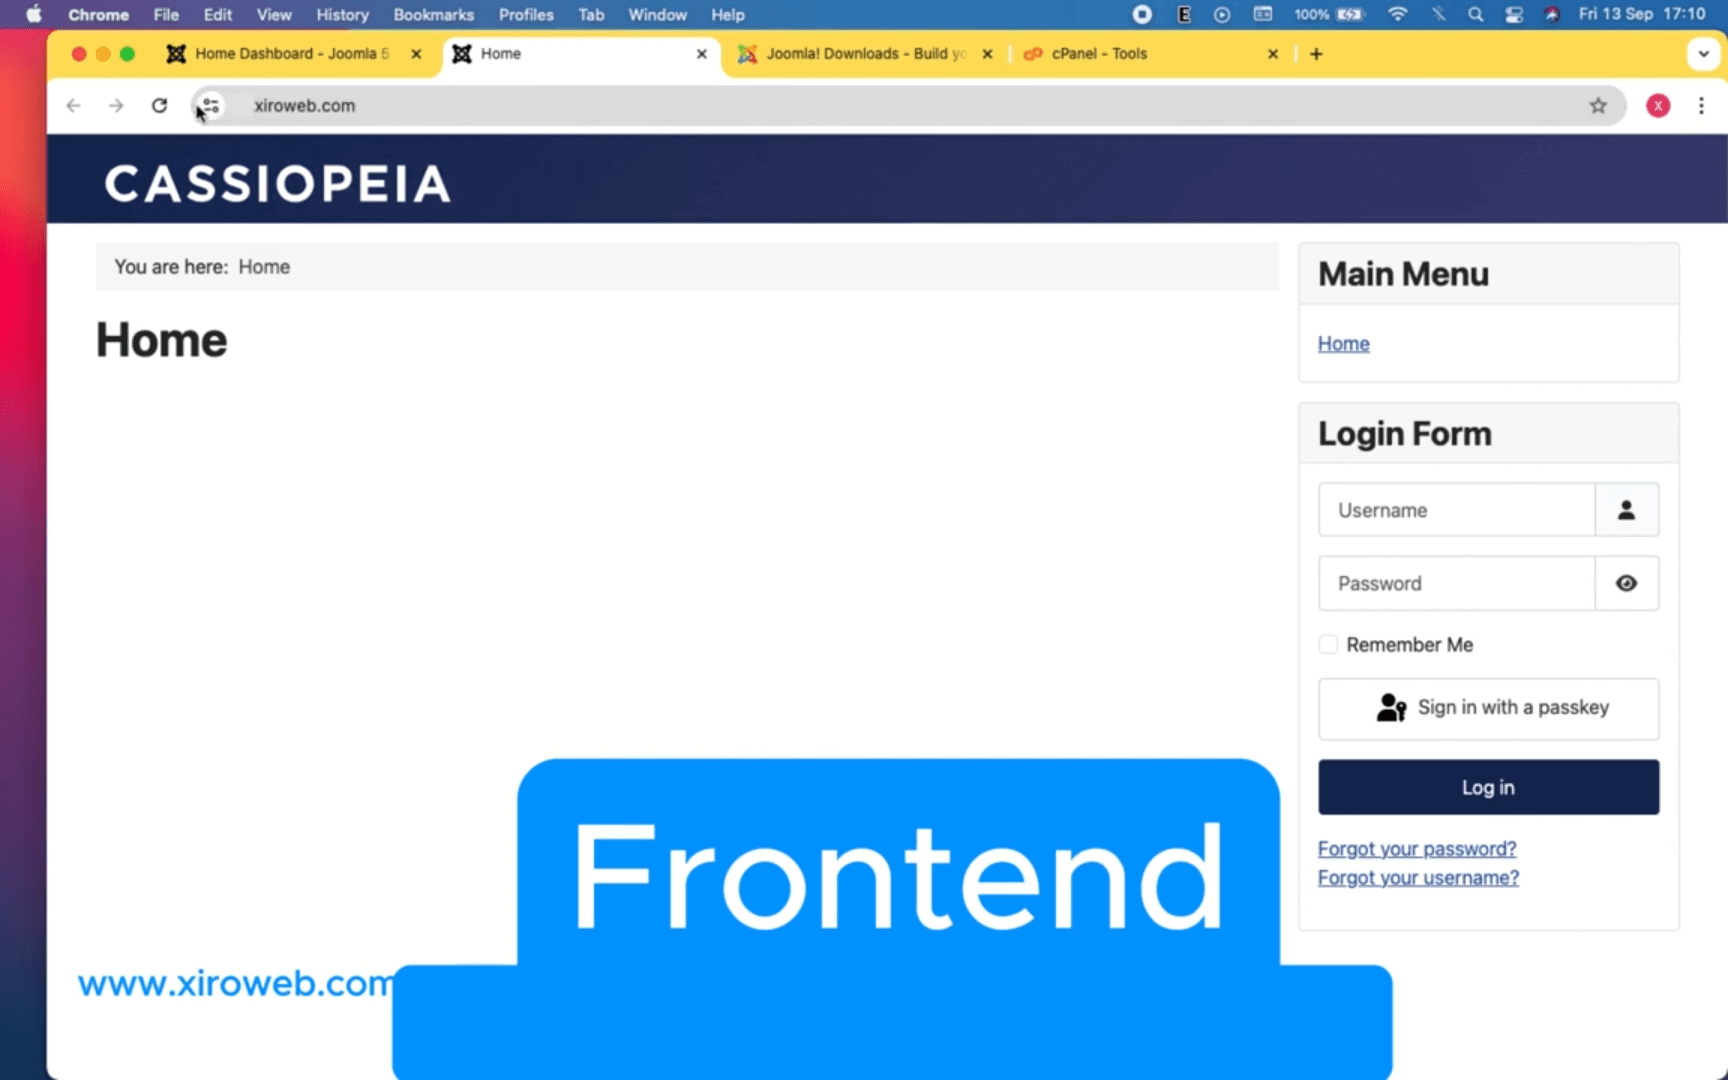
6. Installation Complete: Accessing the Backend and Frontend
Backend (Administrator dashboard)
After installation, you’ll see a login form. Use the Super User account you created during setup to log in.
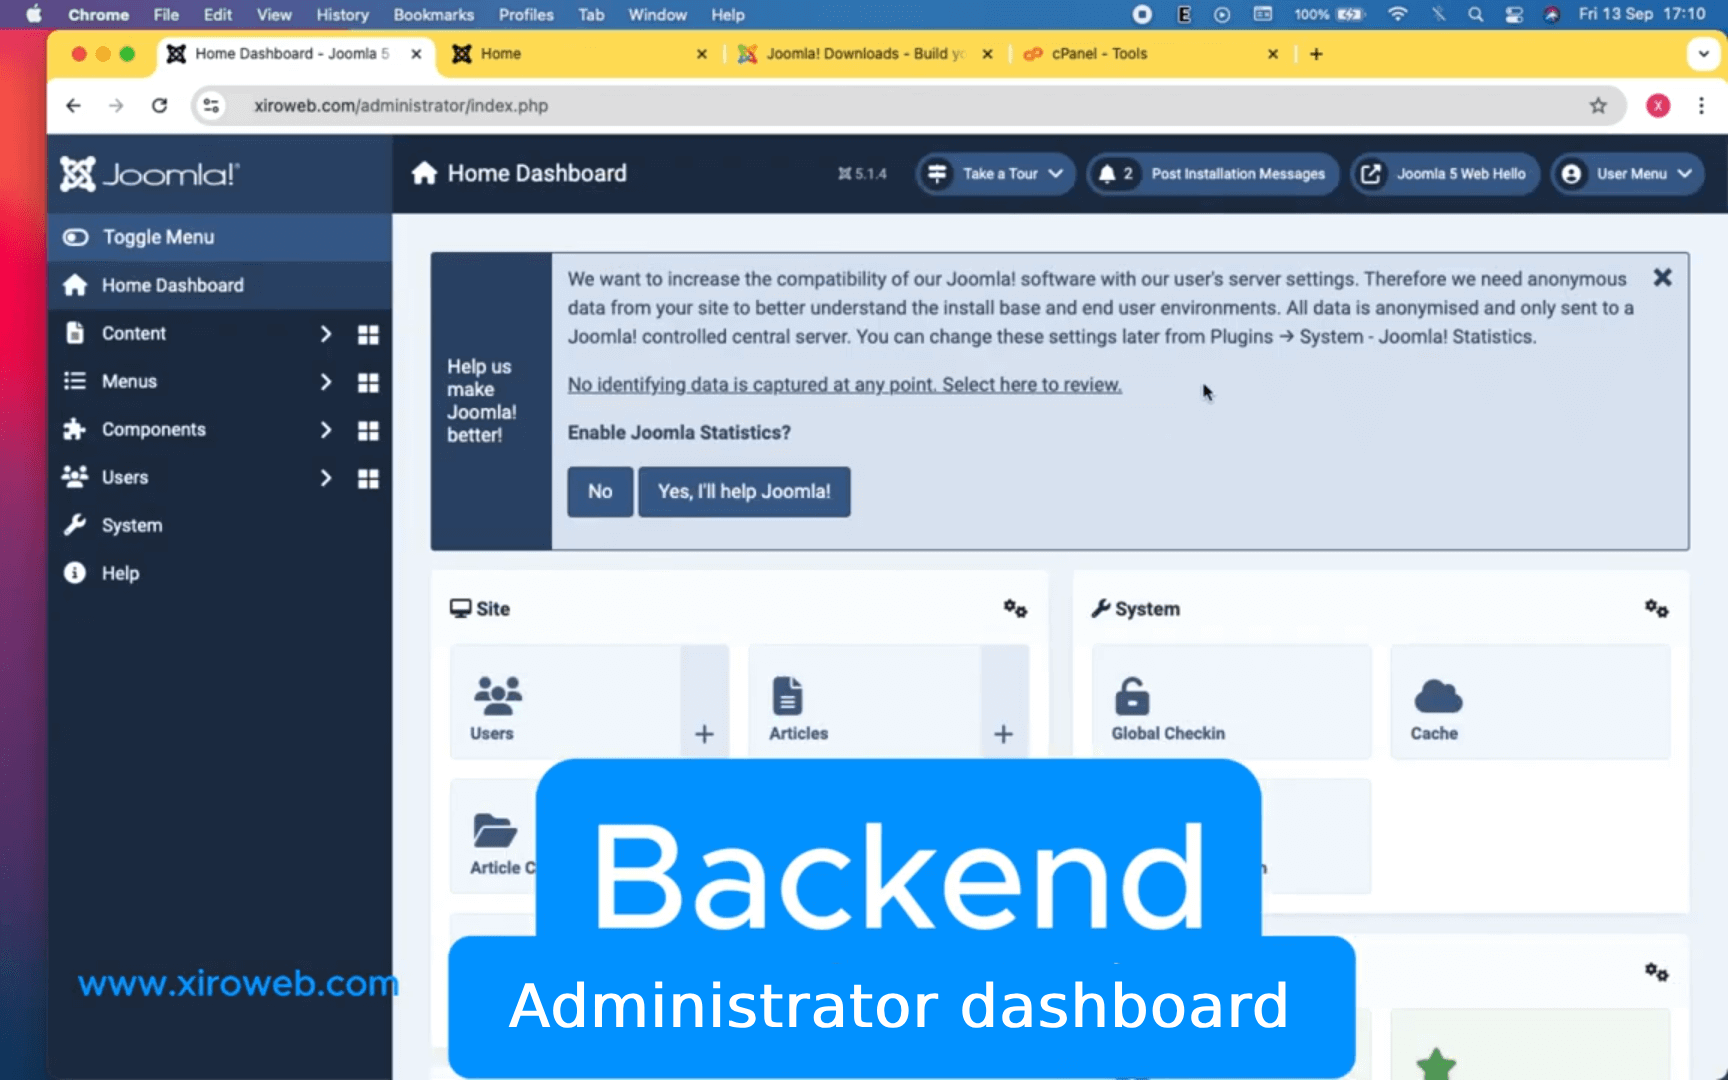
The Backend (Administrator Dashboard) is your private control center for managing, customizing, and building your website. Only admin users have access to this area.
Joomla’s Backend (Administrator Dashboard) provides all the tools you need to manage your site and build the Frontend.
As a website administrator, you’ll frequently log into the Backend to manage your site.
To access the admin panel, add /administrator/ to your website’s URL. For example:
👉 http://yourdomain.com/administrator/
Frontend - Your Website’s Public View
The Frontend is the actual website that visitors will see. This is where you'll design and structure your content.
At first, the site will be empty since no content has been added yet. Through practice and customization, you'll gradually build and shape your website step by step.
Dustin Dzung
Dustin Dzung with 15 years of experience in using and developing websites with Joomla!, from the first version of Mambo to Joomla! 1.0 and up to the present Joomla! 5.x.